

Mastering Character Unity Locomotion: Seamless Idle, Walk, and Run Transitions in Unity
Building a character that actually “feels” good to move is the first major hurdle for any developer. It’s the difference between a game that feels like a polished AAA experience and one that feels like a floaty physics experiment gone wrong. Whether you’re animating a brave hero or a wandering bear in the wild, the synergy between movement and visuals is key.
Consequently, in this guide, we’ll break down the “Holy Trinity” of Unity character development: Cinemachine for professional camera work, the Character Controller for precise movement, and the Animator to bring it all to life. We will build a fluid system where your character transitions naturally from a calm Idle to a steady Walk and a full Run based on your keyboard input.
A) The Animator Controller: The Brain of Your Animations
The Animator Controller is a Unity asset that acts as a state machine for your character’s visual behavior. It doesn’t just “play” clips; it decides which clip to play and how to blend them together seamlessly.
- States & Transitions: Each animation (Idle, Walk, Run) is a “State.” Transitions are the logic wires connecting them.
- Parameters: These are variables (like a Float called
Speed) that you control via code. - Blend Trees: For movement, we often use a Blend Tree. This allows the character to move smoothly between a walk and a run based on the
Speedvalue, preventing the “snapping” effect between different animations.
B) The Character Controller: Movement Without the “Physics Headache”
While Unity has a Rigidbody system for full physics, the Character Controller is a specialized component designed specifically for players.
- Collision-Based: It acts as a capsule-shaped collider that can be told to move in a direction via script.
- Constraint Logic: It automatically handles climbing stairs (Step Offset) and sliding along walls or slopes without needing complex physics materials.
- Non-Physical: Unlike a Rigidbody, it is not affected by external forces like gravity or explosions unless you manually code that behavior, giving you absolute “Doom-style” precision over how the character handles.
C) The C# Script: Bridging Input and Action
The C# Script is the glue that holds everything together. Its job is to listen for keyboard inputs (like WASD or Arrow keys) and translate them into two things:
- Movement: Telling the Character Controller to move the mesh in 3D space.
- Animation: Updating the Animator Controller’s parameters.
Although by sending a Float value to the Animator based on how hard the player is pushing the “joystick” or keyboard, the script tells the Animator, “Hey, we’re moving at speed 5.0—start the Run animation!”
D) Cinemachine: The Professional Camera Rig
Gone are the days of parenting a camera to a player and hoping it doesn’t clip through walls. Cinemachine is a modular suite of tools that provides AAA-quality camera behavior.
- Virtual Cameras: Instead of moving the “Main Camera,” you create a Virtual Camera that follows the player.
- 3rd Person Follow: This component keeps the camera at a constant distance and height, often with a “shoulder offset” for that classic over-the-shoulder look.
- Damping: Cinemachine adds “weight” to the camera movement. When the character starts running, the camera doesn’t jerk instantly; it follows with a smooth, organic lag that makes the world feel more immersive.
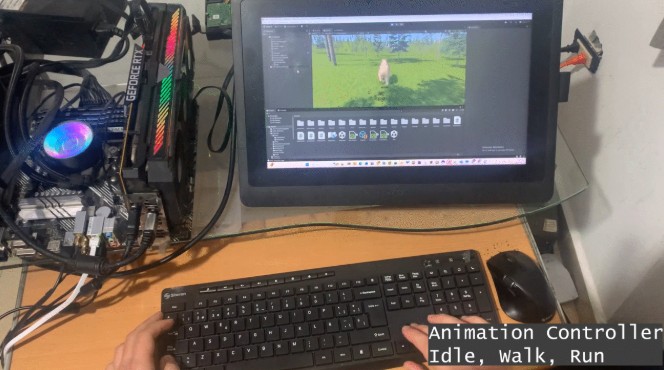
Idle, Walk, and Run Animation: Unity Tutorial
We are using a Panda with 3D animations, which we created using a 3D AI Pipeline:
-animations were created using https://app.anything.world/
Yoy can check my tutorial on how to create from an image or 2D conceptual art a 3D model animal with AI
If you need a character fully animated, you can use Tripo AI, created with AI. You can check my YouTube Tutorial to then transfer the high poly to a Low Poly using Quad Remesher for Blender
You can check my tutorial on Baking High Poly to Low poly tiger for animation prototype #blender #gamedev
- First, import the Panda animations to Unity


- Then, extract the animations from the imported FBX containing skin, material, mesh, rig, and animation.


- Then move all animations to a separate folder to better organize animation assets.

Then, set Loop Time to true for all animations

- Continue by pressing the right mouse click on the Project Window and creating an Animator Controller.

We are naming it “PandaBearAC“.
AC-> Stands for animation Controller so we name our assets with a convention to be better discoverable, querying, and filtering.
- Then we open the PandaBearAC Animator Controller

- We continue by dragging the 3 animations (Idle, Walk, Run) into the Animator Controller

- Make a transition by right-clicking the Animation State and connecting to another animation

- Then add a parameter Speed as a Float number

- Remove Has Exit Time and
- Add a Speed Condition and set if Speed is greater than .01 then the Idle Animation will make a Transition to Walk Animation.

- Add a Speed Condition and set if Speed is Less than .01 then the WalkAnimation will make a Transition to Idle Animation, and uncheck “Has Exit Time“.

- Add a Speed Condition and set if Speed is Greater than .5 then the Walk Animation will make a Transition to Run Animation, and uncheck Has Exit Time.

Add a Speed Condition and set if Speed is Less than .5 then the Run Animation will make a Transition to Walk Animation, and uncheck Has Exit Time.

Add Character (Panda) Mesh to Unity


Add a component Panda Script
using UnityEngine;

public class PandaThirdPersonController : MonoBehaviour
{
    public CharacterController controller;
    public Transform cam;
    public Animator animator;

    public float speed = 6f;
    public float turnSmoothTime = 0.1f;
    float turnSmoothVelocity;

    // GRAVITY VARIABLES
    public float gravity = -9.81f;
    Vector3 velocity;
    public float groundDistance = 0.4f;
    public LayerMask groundMask;
    bool isGrounded;

    void Update()
    {
        // 1. GRAVITY CHECK
        // This checks if the bottom of the controller is touching the ground
        isGrounded = controller.isGrounded;

        if (isGrounded && velocity.y < 0)
        {
            velocity.y = -2f; // Keeps the player stuck to the ground
        }

        // 2. MOVEMENT INPUT
        // Note: If using the Old Input System, ensure Project Settings > Player > Active Input Handling is set to "Both" or "Input Manager"
        float horizontal = Input.GetAxisRaw("Horizontal");
        float vertical = Input.GetAxisRaw("Vertical");
        Vector3 direction = new Vector3(horizontal, 0f, vertical).normalized;

        // 3. MOVE & ROTATE
        if (direction.magnitude >= 0.1f)
        {
            float targetAngle = Mathf.Atan2(direction.x, direction.z) * Mathf.Rad2Deg + cam.eulerAngles.y;
            float angle = Mathf.SmoothDampAngle(transform.eulerAngles.y, targetAngle, ref turnSmoothVelocity, turnSmoothTime);
            transform.rotation = Quaternion.Euler(0f, angle, 0f);

            Vector3 moveDir = Quaternion.Euler(0f, targetAngle, 0f) * Vector3.forward;
            controller.Move(moveDir.normalized * speed * Time.deltaTime);
        }

        // 4. APPLY GRAVITY
        velocity.y += gravity * Time.deltaTime;
        controller.Move(velocity * Time.deltaTime);

        // 5. ANIMATION
        float inputMagnitude = direction.magnitude;
        if (Input.GetKey(KeyCode.LeftShift)) { inputMagnitude *= 1f; } // Run
        else { inputMagnitude *= 0.5f; } // Walk

        if (direction.magnitude < 0.1f) inputMagnitude = 0f;

        animator.SetFloat("Speed", inputMagnitude, 0.1f, Time.deltaTime);
    }
}
Add a Character Controller component

Adjusting Character Component Radius and center
Meet your own Character Controller collider needs, tweak values until you meet your concept design and game design mechanics needs.

Important: Adding an Animator Component and wiring your Animator Controller

Finally, Connect your Controller, Main Camera, and Animator

Cinemachine Third Person Camera: FreeLook Camera
On Window > Package Manager > Unity Registry > Enable Cinemachine

Then, add a Cinemachine Freelook Camera

- Cinemachine FreeLook Camera will override the Unity Main Camera.
- Connect your character as the tracking target