
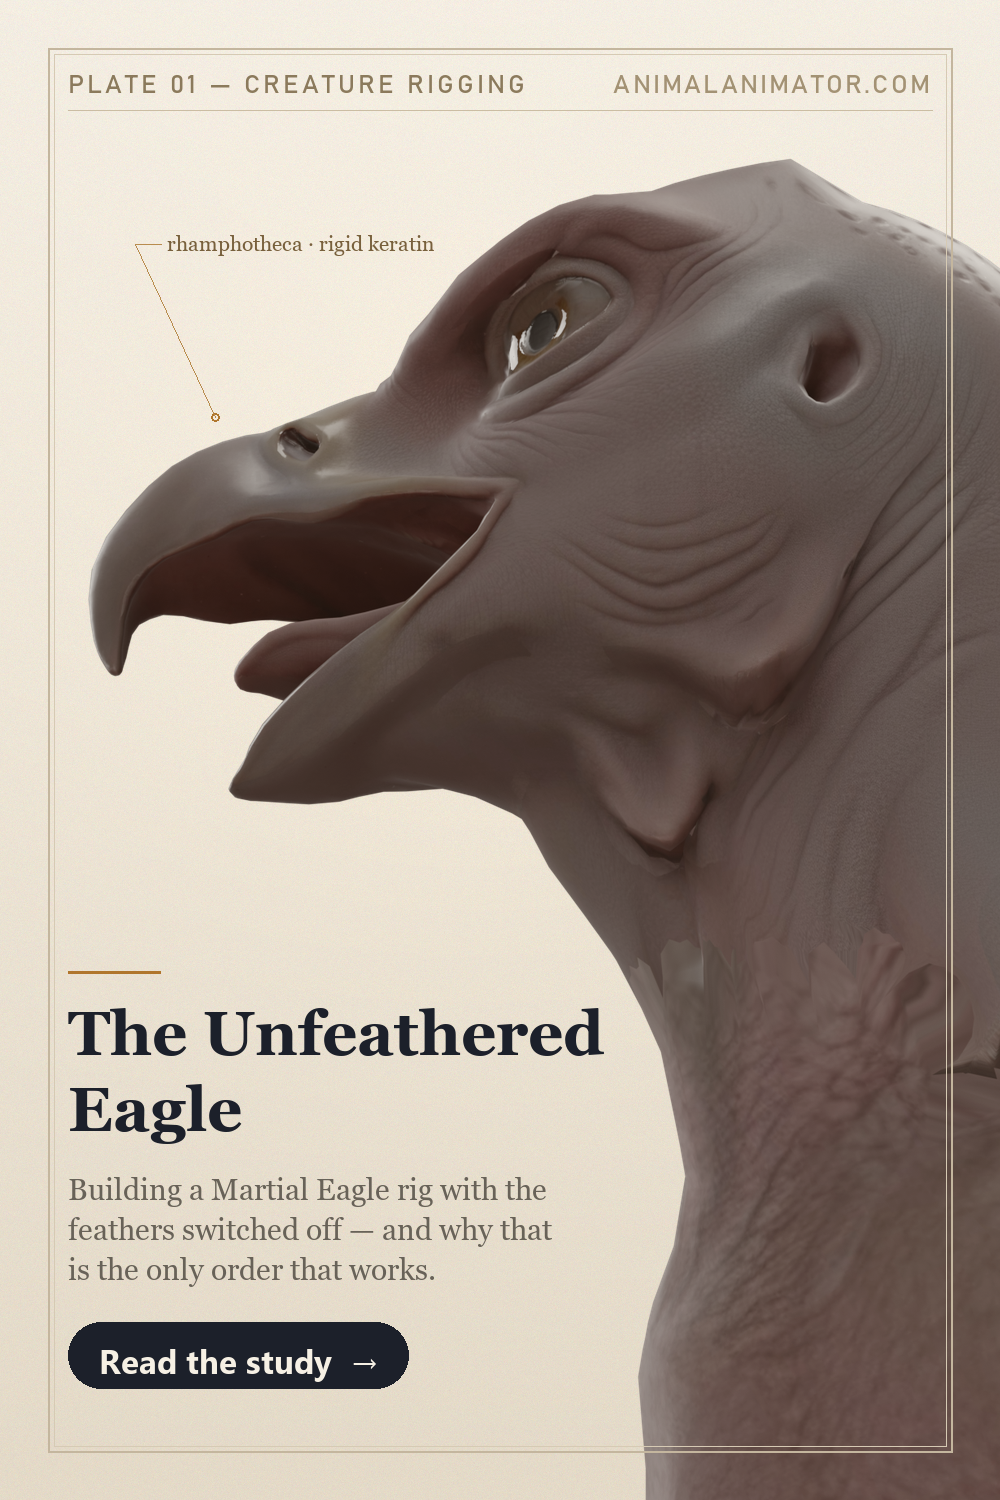
Intro
There is a moment in every creature project where you have to decide what you are actually building. Not what it will look like — what it is, underneath. For a bird, that decision arrives early and it is uncomfortable, because a bird is mostly not there. Strip the feathers from an eagle and you lose about a third of its silhouette. The majestic two-metre wingspan collapses into a pair of surprisingly short, muscular arms. The proud chest becomes a keel. The thick powerful neck turns out to be a thin, astonishingly long S-curve of vertebrae that the feathers were hiding all along.
That naked bird is the thing you have to rig.
This article is about building the African Martial Eagle rig the hard way: skin first, feathers last. No feather geometry, no hair particles, no fluff to hide behind — just an exposed-skin sculpt, an armature, and weights that have to survive being looked at. Only once that deforms correctly do the feathers go on, as separate geometry driven by the same rig.
It is more work. It is slower to get to a pretty screenshot. It is, I will argue, the only order that actually works.
Why featherless first
The argument is simple: feathers hide errors, and hidden errors get shipped.
A feathered eagle is a forgiving thing to rig. Wrap the whole body in overlapping cards and you can be sloppy with the shoulder weights, because nobody will ever see the shoulder. Pinch the neck badly and a collar of contour feathers will cover the pinch. The rig will look fine right up until an animator pushes a pose twenty degrees further than you tested, at which point the skin punches through the feather layer and you are debugging two systems at once — under deadline, with the feathers in the way.
Working skin-first inverts that. Every deformation error is visible immediately, on a plain grey surface, at the moment you create it. There is nowhere for a mistake to hide, which is exactly the property you want from a diagnostic environment.
There is a second reason, and it is anatomical rather than practical. Feathers are not skin. On a real bird, the large flight feathers of the wing are anchored directly to bone — the primaries to the hand, the secondaries to the ulna. They do not slide around with the skin; they rotate rigidly with the skeleton, which is precisely why a bird can fan and close its wing like a hand of cards. If you sculpt feathers into your body mesh and skin the whole thing as one surface, you have modelled that relationship wrongly and no amount of weight painting will recover it.
Separating the layers lets each one be driven correctly:
- Flight feathers (primaries, secondaries, alula) are parented to bones. They inherit a bone’s transform rigidly, which is anatomically true and computationally free.
- Contour and body feathers get the same armature modifier as the skin, so they follow the surface as it stretches and compresses.
- The skin carries the deformation load and is validated on its own, before either feather layer exists.
That is three systems with three clear jobs, instead of one mesh doing all three badly. And the featherless rig remains useful forever afterwards: it is the version you go back to when something breaks, because it is the only version where you can see.
a) How bones work in Blender
An armature is an object like any other. Inside it lives a hierarchy of bones, and the single most important thing to understand is that a bone is not a piece of geometry — it is a coordinate system with a parent.
Each bone has a head (its origin), a tail (which defines its length and primary axis), and a roll, which decides how the bone’s local X and Z axes are oriented around that axis. Roll is the part beginners skip and then suffer for. If your neck bones have inconsistent roll, rotating them all “the same way” will produce a corkscrew instead of a curve, because “the same way” means something different for each bone.
Blender shows you three views of the same skeleton, and confusing them causes most early frustration:
- Edit Mode — where bones live. Positions, lengths, roll, parenting. This is the rest pose, the reference against which all deformation is measured. Changing it after you have weighted the mesh invalidates your work.
- Pose Mode — where bones move. Rotations and translations here are offsets from the rest pose. This is what animators touch.
- Object Mode — where the armature as a whole sits in the scene.
A bone’s transform is inherited from its parent, so a chain multiplies: rotate the first neck segment and everything above it comes along. This is what makes a rig feel like a skeleton and also what makes long chains treacherous, since small errors compound down the chain.
Two more mechanisms matter for a bird:
Constraints let one bone be driven by another. The classic case is inverse kinematics: instead of rotating the femur, then the shin, then the foot to place a talon, you place an IK target and Blender solves the chain. On the Martial Eagle rig the legs use a three-bone IK chain with a pole target to control which way the knee points — and, crucially, an IK/FK blend, because an IK chain that is always on makes the leg bones appear dead when an animator tries to rotate them directly.
Drivers let one value control another with an expression. On this rig, the tongue lifts automatically as the beak closes, and the upper bill lifts as the gape widens, because those are mechanical consequences of the jaw and no animator should have to key them by hand. A good rule: if a relationship is anatomically obligatory, drive it; if it is an artistic choice, leave it free.
Finally, bones split into two populations, and keeping them separate is what makes a rig usable. Deform bones are bound to the mesh. Control bones are the things the animator grabs — IK targets, pole vectors, a root. The Martial Eagle armature has 72 bones, of which 64 deform; the remaining eight are controls and driver helpers that never touch a vertex.
b) How weight painting works in Blender
When you bind a mesh to an armature, every vertex gets a list of bone influences, each a number between 0 and 1. To find where a vertex ends up, Blender transforms it by every influencing bone and blends the results in proportion to those weights. That is all skinning is: a weighted average of several possible answers.
Two consequences follow immediately, and they explain almost every weighting problem.
Weights should sum to one. If a vertex’s influences add up to 0.6, it moves only 60% as far as its bones — it lags behind the surface and produces a dent. If they sum to zero, it does not move at all while its neighbours do, and you get a spike. This is why Normalize All exists and why the first thing to check on a suspicious mesh is the weight totals, not the paint.
A blend of two rotations is not a rotation. Averaging positions between two bones pulls the result inward, toward the chord rather than the arc. This is the entire cause of the “candy wrapper” — a limb that pinches to a waist when it twists — and it is a mathematical property of linear blending, not a mistake you made. You manage it with geometry (enough edge loops for the blend to happen gradually) and with the width of your falloff, not by painting harder.
In practice, weighting is a conversation between three tools:
- Automatic Weights on binding, which uses bone heat to make a first guess. It is a good start on limbs and a poor one on faces, where geometry that is close in space is often far apart on the surface — the upper and lower halves of an open beak being the obvious case.
- The brush, in Weight Paint mode. Add, Subtract, Blur. Blur is the one that does the most work; hard-edged weight boundaries tear.
- Scripted weights, for anything with a rule behind it. On the Martial Eagle the whole face is authored this way — geodesic falloffs measured along the surface from the beak and mandible tips rather than through space, so that the open gape correctly separates the upper bill from the lower jaw. A brush cannot express “distance along the mesh,” and on a face that distinction is everything.
The failure that costs the most time is not a bad brush stroke. It is a good weight on the wrong geometry — a vertex group that includes vertices you did not intend, so that the numbers look sensible while the deformation is nonsense. Which brings us to testing.
c) How to test that the rig actually deforms correctly
Do not judge a rig by looking at it in a nice pose. Judge it by trying to break it, and by measuring.
1. Shoot a rest-pose control. Before anything else, render the mesh with every bone zeroed, from the same angles you will use for your posed shots. This is the single most valuable image in a rig review and almost everybody skips it. When something looks wrong later, the first question is always “was it already like that?” — and without a control you will repaint weights for hours chasing a defect that was sculpted in.
On this project that is exactly what happened. A chain of small nodules along the spine looked precisely like a weighting failure. They are fully present with the rig at rest. They are a sculpt artefact from the merge that fused the head to the body, and no weight work would ever have touched them.
2. Pose to the extremes, not to the pretty middle. Build a small set of deliberate stress poses, each aimed at a different subsystem — maximum gape, maximum axial twist in the neck, full wing fold, full wing extension, an isolated face study. Push joints to the limits you have set, because that is where animators will eventually go.
3. Make one pose asymmetric. Rigs are built mirrored and almost always tested mirrored, so a broken weight on one side hides behind its healthy twin indefinitely. Closing one eye and leaving the other open exposes it in a single frame.
4. Render flat grey, not textured. Texture hides geometry. A plain clay surface with cavity shading makes pinching, creasing and collapsed volume read instantly. Keep a textured pass too — stretching in the texture tells you the weights are dragging UVs — but diagnose on the clay.
5. Then stop looking and start measuring. Eyeballing renders is slow and unreliable. Four numerical checks catch nearly everything, and all of them are a few lines of Python:
- Unweighted vertices — any vertex whose deform weights sum to zero.
- Weight totals — vertices summing below ~0.85 or above ~1.15.
- Loose and non-manifold geometry — stray vertices, wire edges, boundary holes.
- Neighbour deviation — for each vertex, its distance from the average of its connected neighbours, measured at rest and again when posed. A vertex that is suddenly far out of line with its neighbours is a spike. Comparing against the rest value is what stops the test flagging every sculpted bump.
On the Martial Eagle mesh, all four came back clean: zero unweighted vertices, zero outside the weight tolerance, zero loose or non-manifold geometry, zero deformation spikes. That result is worth far more than a folder of nice-looking screenshots, because it is falsifiable.
6. Verify your rotation conventions empirically. Do not assume which way a bone turns. Apply a small test rotation on each axis and measure where the bone’s tail actually moves in world space. It takes one script and it saves you from authoring an entire pose library on a sign error. On this rig it revealed that the left and right sides mirror on X but need their Y and Z negated — except the eyelid and brow bones, which do not mirror at all.
d) How much geometry, and why quads
Engines triangulate everything at import. Quads do not exist at runtime. So why insist on them?
Because quads are for you, not for the renderer. A quad grid gives predictable edge flow, subdivides cleanly, and — most importantly — deforms predictably, because the surface bends along continuous loops instead of along the arbitrary diagonal a triangulator happens to choose. A triangle fan through a joint will crease differently depending on which way those hidden diagonals run.
The rules that matter:
- Loops follow the anatomy. Edge loops should run around a joint, perpendicular to the axis it bends on. A loop that crosses a joint diagonally will always crease.
- Three loops minimum at any bending joint — one at the pivot, one either side — for games. Four or five for film, where the camera gets closer and subdivision is on.
- Density belongs where it bends, not where it is flat. A bird’s back can be sparse. Its neck, jaw, eyelids and toes cannot.
- Triangles are acceptable in flat, non-deforming areas. They are a problem inside a deforming region.
- N-gons are never acceptable in a deforming region. A face with eight or twenty sides has no defined interior flow, and it will collapse unpredictably.
Rough budgets, in triangles, for a creature of this kind:
| Use | Triangle budget | Notes |
|---|---|---|
| Background / AI creature, many on screen | 3k – 15k | LODs mandatory |
| Hero game creature, current-gen | 20k – 60k | This is where most rigged animals sit |
| Cinematic / film base cage | 10k – 40k quads | Subdivided at render; the cage stays light |
| Film render mesh | Effectively unbounded | Displacement and subdivision do the work |
The Martial Eagle mesh sits at 12,339 vertices and 12,147 faces — 24,674 triangles once triangulated, and 98.7% quads. That is squarely in hero-game-creature territory and light enough to subdivide for film work.
The distribution is more interesting than the total. Roughly a quarter of all geometry is in the head — 1,257 vertices on the upper bill, 1,106 on the skull, 990 on the jaw — which is correct for an asset whose face carries the performance. And the sparse regions are sparse where it is safe to be.
But the audit found something worth stating plainly, because it is the honest version of “98.7% quads is fine”:
All 163 non-quad faces are in one place. Not scattered — concentrated in a single band on the neck, at the seam where the sculpted head was merged onto the body. Some are extreme: a 25-sided face, a 22, three 20s. Every one of the 114 valence-2 vertices on the mesh is in the same band. The mesh is watertight — zero boundary edges, zero non-manifold edges — so it is not broken. But the worst topology on the model is sitting in the region that undergoes the most extreme deformation in the entire test set, which is the neck coil.
It has not failed yet. The weights are clean enough to carry it. It is still the first thing I would retopologise, and I would not have known it was there without counting.
That is the argument for the featherless rig in one sentence: you cannot fix what you cannot see, and feathers are very good at making sure you cannot see it.
Stress-testing a Martial Eagle rig: five poses, fifteen angles
Before an animal rig goes anywhere near a game engine, it has to earn its keep. A rig can look perfect in its rest pose and still fall apart the moment a joint reaches the end of its range — a shoulder that creases into a fold, a neck that shrink-wraps when it twists, a jaw that drags half the cheek with it. None of that shows up in a turntable of the bind pose. It only shows up under load.
So I built a deliberate stress test for the African Martial Eagle: five poses, each one aimed at a different part of the rig, each shot from three angles. Every image is rendered twice — once with the skin material, once as flat grey clay. The clay pass is the one that matters for diagnosis. Texture hides geometry; flat grey hides nothing. Pinching, candy-wrapping and collapsed volume all read instantly on an untextured surface, and any stretching in the skin pass tells you the weights are dragging UVs around.
There is also a sixth set: the rest pose with every bone zeroed. That is the control. Anything visible in the control image is in the sculpt, and no amount of weight painting will fix it. It is the single most useful image in the set, and the one people skip.
Pose 0 — Rest reference
Every bone at zero. This is the baseline, and it exists so the other five poses can be read honestly. When something looks wrong in a posed shot, the first question is always “was it already like that?” Without a control you end up repainting weights to chase a problem that was sculpted in.
In this case the control earned its place immediately — see the findings at the end.
Pose 1 — Territorial call


What it tests: the jaw at full gape, and the shoulder at maximum elevation.
The beak is open to the limit of its rotation, the head is thrown back over an extended neck, and the wings are held spread and raised rather than folded. Three things are under load at once here. The jaw is the highest-risk joint on any bird head, because the weights have to release the cheek and jowl cleanly while carrying the lower mandible — get that wrong and the whole side of the face moves with the beak. The neck is in full extension, which is where a chain of short segments tends to show banding. And the shoulder is raised, which is the opposite extreme from the folded wing in Pose 3.
This is also the pose most likely to reveal problems inside the mouth, where geometry is tightly packed and easy to intersect.
Pose 2 — Neck coil


What it tests: axial twist distributed through a chain.
The bird is looking back over its own shoulder — roughly ninety degrees of yaw fed through the upper neck and skull, on top of a lift through the lower neck. This is the classic candy-wrapper test. When a chain of bones twists and the weights are too tightly localised, the surface pinches at each joint and the neck narrows like a twisted sweet wrapper. When the weights are too loose, the whole neck rotates as one tube and the silhouette goes stiff.
Getting this pose to read at all is itself a rig lesson. The neck segments are short, so yawing the entire chain at once simply drives the head into the shoulder. The turn has to be built by lifting the neck clear first, then feeding the rotation in through the upper segments. A rig that can only turn its head by burying it in its own body is a rig with a neck that is too short or too coarsely divided.
Pose 3 — Perched, wings folded, talons closed


What it tests: compression, and the toe chain at full grip.
Everything here is folding rather than extending. The wing is packed against the flank with the elbow and wrist near the end of their travel, the neck is in the S-curve a perched bird actually rests in, and the talons are fully clenched. Compression is harder on a rig than extension: extending a joint stretches the surface, which forgives sloppy weights, but folding one pushes surfaces into each other and every weighting error shows up as a crease, a collapse, or a bulge in the wrong place.
Choosing the fold angles was not guesswork. I rendered six different combinations of shoulder, elbow and wrist rotation and compared them side by side; only one packed the wing against the body instead of leaving it flared out like a blade. That comparison is worth doing on any winged rig, because the “correct” anatomical numbers rarely survive contact with a specific sculpt.
Pose 4 — Landing flare


What it tests: the exact inverse of Pose 3.
Wings thrown up and forward with a pronation twist, body rocked back, legs reaching ahead, talons spread wide open. Where Pose 3 folds everything, this extends everything. Running a rig to both ends of its range and comparing the two is how you find joints that work in one direction and fail in the other — a very common asymmetry, especially in shoulders, where artists tend to test the pose they plan to animate and never the opposite.
The twist on the wing bones is the detail worth watching. Rotation along the length of a bone is the deformation most likely to be under-supported by the weights, because it produces no obvious movement of the joint itself — the surface just quietly collapses.
Pose 5 — Face study – Mesh errors below the tongue


What it tests: the face, isolated and asymmetric.
Beak sealed, tongue raised to its limit, brows opposed, and a deliberate asymmetry — the left eye closed, the right eye open. The asymmetry is the point. Rigs are usually built mirrored and almost always tested mirrored, which means a broken weight on one side can hide behind its healthy twin for months. Driving the two sides differently in a single pose exposes that immediately, and the three camera angles are chosen to show the closed eye, the profile, and the open eye in turn.
The face is where a bird rig is won or lost. It carries the most hand-authored weighting, the tightest geometry, and, on this asset, painted eyes rather than modelled eyeballs — so the lids close by sweeping skin across the dome rather than sliding over a sphere. That is a real constraint and it is worth photographing honestly rather than hiding at a flattering angle.
What the test actually found
The headline result is a good one: the skinning is clean. Every vertex on the mesh carries a full set of deform weights — no unweighted vertices, no vertices summing to less than one, no loose or wire geometry, and no vertices flying away from their neighbours under deformation. Those are the four failure modes that produce the classic “exploding mesh”, and none of them are present.
The one visible defect is not a rigging problem at all. Along the dorsal midline, between the shoulders, there is a chain of small detached nodules erupting from the surface — clearly visible in the rear-high angles. It looks exactly like a weighting failure, which is what makes the control image so valuable: the nodules are present with every bone at zero. They are in the sculpt, baked into the base mesh, most likely left over from the merge that fused the head and body. Repainting weights would never have touched them. The fix belongs in sculpt mode, not weight paint mode.
That distinction — geometry defect versus skinning defect — is the entire reason to shoot a rest-pose control alongside the posed set, and it is the habit I would recommend to anyone reviewing a creature rig.
Top resources
Blender documentation — start here, it is better than its reputation.
- Armatures and rigging:
docs.blender.org/manual/en/latest/animation/armatures/index.html - Skinning and the Armature modifier:
docs.blender.org/manual/en/latest/animation/armatures/skinning/index.html - Weight Paint mode:
docs.blender.org/manual/en/latest/sculpt_paint/weight_paint/index.html - Rigify, worth reading even if you hand-build:
docs.blender.org/manual/en/latest/addons/rigging/rigify/index.html - Python API, for scripted weights and automated checks:
docs.blender.org/api/current/
Anatomy — the most important entry on this list
- Katrina van Grouw, The Unfeathered Bird (Princeton University Press). Bird skeletons and musculature drawn in life poses, by an author who is both an ornithologist and an illustrator. If you are rigging a bird without feathers, this book is not optional.
- Eliot Goldfinger, Animal Anatomy for Artists — broader, excellent on how muscle shapes change under motion.
Rigging craft
- Blender Studio (
studio.blender.org) — production.blendfiles from the open movies. Opening a finished character rig and taking it apart teaches more than any tutorial. - Pierrick Picaut (P2Design) — The Art of Effective Rigging in Blender; strong on creature work and on why rigs are built the way they are.
- CGDive — the most consistently rigorous Blender rigging channel; particularly good on bone constraints, drivers and rig UI.
Topology and deformation
- Search out edge-flow references for facial and joint topology; the principles transfer wholesale from film character work to creatures. The vocabulary to look for is edge loop, pole, and deformation loop.
On testing
- The best resource here is your own scripts. Nothing you read will beat forty lines of Python that count unweighted vertices and flag neighbour deviation on your specific mesh, run every time you touch the weights.
A pyramid under the tongue: debugging a bird jaw in Blender
The symptom
Close the jaw on the Martial Eagle rig and a faceted pyramid erupts out of the floor of the mouth, just in front of the tongue. It is not subtle. At -12° it is a visible shard; at -19° it punches clean through the mandible.
The obvious reading is that the jaw bone is deforming the lower beak. And that reading is anatomically alarming, because a bird’s beak cannot deform. The rhamphotheca — the horny sheath over both mandibles — is keratin. It is as rigid as a fingernail. Both the upper bill and the lower mandible must move as perfectly rigid bodies, rotating about the jaw joint and nothing else. Any bend, any taper, any shear across that horn is wrong, full stop.
So the instinct is to go into Weight Paint mode and start scrubbing the beak.
That instinct would have wasted a day, because the beak was never the problem.
The jaw bug: before and after
Measure first, paint second
Before touching a single weight, two measurements.
Test one: is the horn actually rigid? A rigid body preserves every internal distance. So take every vertex the jaw owns, fit the best possible rigid transform between its rest position and its posed position, and look at the residuals. If the horn is rigid, every residual is zero.
The result was decisive. Of 414 mandible vertices, 402 fit a rigid transform to within 0.0003 mm — the median residual was three ten-thousandths of a millimetre. The upper bill was rigid to 0.001% strain. The horn was already perfect.
Only four vertices broke rigidity, with residuals up to 1.83 mm. Four. And all four sat in the same place: the root of the tongue.
Test two: where does the skinning tear? For every edge in the mesh, compare the weight vectors of the two vertices it joins. Adjacent vertices driven by different bones are where a surface shears apart, and you can find them without posing anything.
This found 30 edges in the mouth with an L1 distance of 2.0 — the maximum possible value, meaning the two vertices at each end of those edges shared no bone at all. One vertex was 100% jaw. Its immediate neighbour was 100% tongue_01. A hard 0-to-1 flip across a single edge, with no transition whatsoever.
The real mechanism
Here is why that binary seam is fatal on this particular rig.
tongue_01 is not a child of the jaw. It hangs off tongue_drv, and tongue_drv is driven by the jaw at roughly 0.55×, so the tongue lifts automatically as the beak closes. That is good rig design — it is a mechanical consequence of the jaw and no animator should have to key it by hand.
But it means a tongue vertex rotates by about 1.55× the jaw angle, about a different pivot, while the mouth-floor vertex touching it rotates by exactly 1.0×. At -19° of jaw that is more than ten degrees of differential rotation, applied across a single edge, with zero blending to absorb it.
The surface has no choice. It shears. The faceted pyramid is simply the mesh being torn between two bones that disagree about where it should be.
The beak was rigid the whole time. The tongue was ripping out of the floor of the mouth.
The fix I got wrong first
My first attempt was the obvious one: blend across the seam. Three rings of gradient either side, jaw fading into tongue.
It made things worse. Peak mandible strain went from 25% to 45%.
The reason is worth sitting with, because it is the whole lesson of this article. Blending symmetrically pulled three rings of rigid mandible floor into partial tongue influence. Those floor vertices then inherited a fraction of the tongue’s extra driven rotation — so the horn, which had been perfect, started to flex. I had smoothed the tear by breaking the rigid body next to it.
You cannot fix a rigid structure by softening it.
The fix that worked

The mouth floor is rigid mandible. The tongue root is soft tissue. So the entire gradient belongs inside the tongue, and the floor must not be touched at all.
Concretely:
- Measure hop-distance inward from the tongue/floor boundary. The tongue is nine rings deep.
- The boundary ring of the tongue is set to pure
jaw— anatomically correct, the tongue root is fused to the floor. - Over the next four rings, ramp with a smoothstep from
jawtotongue_01. - Beyond that, the tongue is fully its own — the tip keeps its independent movement.
- Strip every
skullandneck_*influence from inside the mouth floor. Nothing behind the head has any business driving the floor of a beak. - Delete the inert
tonguevertex group (see below). - Normalise.
The floor never changes. Not one vertex of the horn is repainted.
| Measurement | Before | After |
|---|---|---|
| Peak mandible strain @ jaw -19° | 25.1% | 1.66% |
| Peak mandible strain @ jaw -12° | 19.8% | 1.16% |
| Upper bill strain | 0.001% | 0.001% (untouched) |
Hard jaw/tongue_01 seams (L1 = 2.0) | 30 | 0 |
A trap worth naming: the inert vertex group

While auditing, I found a vertex group called tongue with 74 vertices at full weight — and no bone of that name anywhere in the armature.
The armature modifier silently ignores vertex groups that do not match a bone. So this group did precisely nothing. But in Weight Paint mode it looks completely real: solid red, weight 1.0, sitting at the top of the list. Anyone debugging the tongue by eye would have concluded the tongue was fully weighted and looked elsewhere.
It was almost certainly left behind when the bone was renamed to tongue_01 during a rig rebuild. Worth grepping your own rigs for: any vertex group whose name is not a bone name is dead weight, and worse than useless because it lies to you.
Reading the weight colours on a beak
Beak weight maps
Blender’s weight-paint ramp runs blue → cyan → green → yellow → red:
- Blue (0.0) — this bone does not move this vertex at all.
- Cyan (0.25) — a quarter share.
- Green (0.5) — an even split with other bones. On a rigid structure, green is a warning colour.
- Yellow (0.75) — three-quarter share.
- Red (1.0) — this bone owns this vertex completely.
Now read the three maps, because a correctly weighted beak has a very distinctive signature.
bill_upper is a flat slab of pure red covering the entire horny upper bill, with a hard edge where the horn ends, and the whole rainbow gradient compressed into the soft skin behind it. That shape is the point. The red region is rigid keratin, so it is binary — every vertex fully owned, no gradient anywhere inside it. The blend lives in the face, which is skin and is supposed to stretch.
jaw shows the same slab of red over the lower horn, for the same reason, with its gradient in the throat. The difference after the fix is at the tongue root, which now ramps red → yellow → green → cyan → blue over five rings instead of flipping straight from red to blue in one edge.
tongue_01 is the exact photographic negative of that root gradient: red at the tip where the tongue moves freely, cooling through green to blue at the root where the mouth floor takes over. Lay the jaw and tongue maps on top of each other and every vertex sums to 1.0.
The rule this illustrates: gradients belong in soft tissue, never inside rigid structures. A smooth falloff across a beak, a claw, a horn, a tooth or a bone plate is always a bug, however pretty it looks in the viewport. Those get binary weights. The transition is pushed off the rigid part entirely and into the skin next door — and that skin needs enough edge loops to absorb it, which is why the gradient in these maps spans five or six rings rather than one.
What I deliberately left alone
Two things, both reported rather than “fixed”, because measurement said they were not hurting anything:
303 vertices share jaw and bill_upper at roughly 50/50 in a band at the corner of the mouth. In principle that is blending two rigid structures, which is exactly what I just said never to do. In practice it measures clean — the upper bill is rigid to 0.001% — because those vertices sit at the hinge where the two bones nearly coincide, and because that corner genuinely is soft tissue (the rictus). Left as is. Worth watching if the gape is ever pushed past its current limit.
The driver ratio is the deeper cause. tongue_drv at 0.55× the jaw is aggressive; it is what generates the differential the weights now have to absorb. The weight fix makes the mesh survive it, but if the tongue ever needs to travel further, the honest fix is to reduce that ratio rather than to keep widening the blend band.
Takeaways
- Measure before you paint. A rigid-body residual test and an edge-wise weight discontinuity scan are each about forty lines of Python, and between them they located this bug to four vertices in a mesh of twelve thousand.
- The visible symptom is rarely the location of the fault. The beak looked broken. The beak was mathematically perfect.
- Rigid means binary. Keratin, bone, claw and shell get weights of 1.0 or 0.0. The gradient goes in the skin beside them.
- Blend asymmetrically across a rigid/soft boundary. All of the give must come from the soft side. Blending evenly across the boundary just breaks the rigid side too.
- Check for vertex groups with no matching bone. They are invisible to the armature and thoroughly convincing in the UI.
Appendix — full bone reference
The rig is 72 bones: 64 deform, 8 controls, plus 20 drivers. Left and right sides are identical mirrors, so paired bones are listed once as name.L / .R.
How to read the limits
Every limit below is a Limit Rotation constraint in local space, written in degrees as [min, max]. A dash means the axis is unconstrained.
Local axis meaning on this rig, measured rather than assumed:
| Axis | Spine, neck, head, legs | Wings |
|---|---|---|
| X | the hinge — bend, flex, nod | flap: + depresses, − elevates |
| Y | rarely used; small stabiliser range | feather twist (pronate / supinate) |
| Z | yaw; + turns toward the bird’s right | fold: − folds back, + extends |
Mirroring: X takes the same value on both sides; Y and Z are negated on .R. The eyelid and brow bones are the exception — they do not mirror on any axis.
Root and body
| Bone | Parent | Deform | Core constraints |
|---|---|---|---|
root | — | no | none — the whole-rig placement control |
torso | root | no | none — body pivot, moves everything but the IK feet |
hips | torso | yes | none |
spine_01 → spine_03 | chain from torso | yes | none |
tail_01 → tail_03 | chain from hips | yes | none |
The spine and neck are deliberately unconstrained. Limits on a long chain fight the animator; the range is controlled by how the chain is posed, not by clamping each segment.
Neck and skull
| Bone | Parent | Deform | Core constraints |
|---|---|---|---|
neck_01 → neck_05 | chain from spine_03 | yes | none |
skull | neck_05 | yes | none |
Five segments of ~26 mm each. Short segments matter: yawing the whole chain at once drives the head into the shoulder, so a look-back has to lift the neck on X first, then feed the yaw through the upper segments.
Face
| Bone | Parent | Deform | Core constraints |
|---|---|---|---|
jaw | skull | yes | Limit Rotation X [−22, 10], Y [−4, 4], Z [−5, 5] · Limit Location (fully locked) |
tongue_drv | jaw | no | none — driven (see below) |
tongue_01 | tongue_drv | yes | X [−11, 11], Y [−7, 7], Z [−12, 12] |
bill_kinesis | skull | no | none — driven (see below) |
bill_upper | bill_kinesis | yes | X [−18, 3], Y [−3, 3], Z [−3, 3] |
lid_upper.L / .R | skull | yes | X [−9, 27], Y [−5, 5], Z [−6, 6] |
lid_lower.L / .R | skull | yes | X [−35, 7], Y [−5, 5], Z [−6, 6] |
brow.L / .R | skull | yes | X [−22, 22], Y [−10, 10], Z [−12, 12] |
The rest pose has the beak wide open, so jaw X is negative to close. The eyes shut at lid_upper +27 and lid_lower −35; brow +22 is the full glare.
jaw also carries a Limit Location with every axis locked. A jaw should rotate and nothing else — locking translation stops an animator sliding the mandible out of the skull, which is invisible in the viewport and obvious in a render.
Wings
| Bone | Parent | Deform | Core constraints |
|---|---|---|---|
shoulder.L / .R | spine_03 | yes | none |
humerus.L / .R | shoulder | yes | none |
ulna.L / .R | humerus | yes | X [−35, 35], Y free, Z [−88, 22] |
manus.L / .R | ulna | yes | X [−30, 30], Y free, Z [−98, 20] |
alula.L / .R | manus | yes | X [−30, 30], Y free, Z [−40, 55] |
primaries.L / .R | manus | yes | none |
Y is left free on every wing bone on purpose. Twist along the bone is what makes a wing read as a wing rather than a paddle, and it is the deformation most likely to be under-supported by weights — clamping it removes the animator’s best tool.
The elbow and wrist fold on negative Z, near their limits. A fully packed wing sits around humerus Z −55, ulna Z −80, manus Z −45, alula Z −30, primaries X +40.
Legs
| Bone | Parent | Deform | Core constraints |
|---|---|---|---|
femur.L / .R | hips | yes | none |
tibiotarsus.L / .R | femur | yes | X [−6, 100], Y [−10, 10], Z [−12, 12] |
tarsometatarsus.L / .R | tibiotarsus | yes | X [−98, 26], Y [−12, 12], Z [−14, 14] · IK |
IK setup on tarsometatarsus:
- Target
foot_ik.L / .R, pole targetknee_pole.L / .R - Chain length 3 (tarsometatarsus → tibiotarsus → femur)
- Pole angle −90°
- Influence is driven by the
leg_ikproperty, not keyed directly
The knee limit [−6, 100] is the important one. Birds only extend the knee slightly past straight, and −6 stops the leg inverting — the single most common broken-leg pose on a bird rig.
Toes
Four toes per foot, three phalanges each — 24 bones.
| Bone | Parent | Deform | Core constraints |
|---|---|---|---|
toe1_01 → toe1_03 (hallux) | chain from tarsometatarsus | yes | X [−58, 18], Y free, Z [−14, 14] |
toe2_01 → toe2_03 | chain from tarsometatarsus | yes | X [−18, 58], Y free, Z [−14, 14] |
toe3_01 → toe3_03 | chain from tarsometatarsus | yes | X [−18, 58], Y free, Z [−14, 14] |
toe4_01 → toe4_03 | chain from tarsometatarsus | yes | X [−18, 58], Y free, Z [−14, 14] |
The hallux limits are inverted relative to the front toes because it points backward. It curls on negative X; toes 2–4 curl on positive X. Getting this sign wrong gives you a foot that opens when it should clench.
Controls (no deformation)
| Bone | Parent | Custom properties |
|---|---|---|
foot_ik.L / .R | root | talon_grip (0–1), leg_ik (0–1) |
knee_pole.L / .R | root | — |
Drivers
Twenty drivers, in three groups. All of them encode a relationship that is mechanically obligatory — if a link is an artistic choice, it stays free.
1 — Talon grip (16 drivers). talon_grip on foot_ik curls the second and third phalanx of every toe:
toe2/3/4_02, toe2/3/4_03 → rotation_euler.x = talon_grip * 0.837758 (+48°)toe1_02, toe1_03 → rotation_euler.x = talon_grip * -0.837758 (−48°)One slider closes sixteen joints, with the hallux opposed so the foot actually grips instead of splaying. talon_grip = 1.0 is a full clench at 48° per phalanx.
2 — IK/FK blend (2 drivers).
tarsometatarsus.L/R → constraints["IK"].influence = leg_ikleg_ik = 0 is pure FK, 1 is pure IK. An always-on IK chain makes the leg bones feel dead when an animator tries to rotate them, which is why this is a blend and not a fixed constraint.
3 — Jaw mechanics (2 drivers).
tongue_drv → rotation_euler.x = 0.55 * jaw.rotation_euler.xbill_kinesis → rotation_euler.x = -0.60 * max(0.0, jaw.rotation_euler.x)The tongue follows the jaw at 55%, and the upper bill lifts at 60% of the gape — cranial kinesis, the hinge that lets a bird raise its upper mandible. The max(0, …) means the upper bill only lifts when the beak opens and stays put when it closes.
⚠️ The 0.55 tongue ratio is aggressive. It is the reason the tongue root and the mouth floor rotate by different amounts, which is exactly where this rig tore. If you copy this setup, either soften the ratio or make sure the weights across that junction are graded rather than binary.
What this means for export
Game and film exporters do not understand drivers or IK. Both must be baked by sampling on export — glTF and FBX will otherwise ship a rig whose tongue, bill, toes and legs simply do not move. Exporting deform bones only also drops the 8 control
bones, taking the runtime skeleton from 72 to 64.
Rigging a Baby Martial Eagle in Blender: Beak, Eyelids & Cranial Kinesis
The two articles genuinely connect — same species, same cranial-kinesis driver idea, very different scale (72 bones here, 41 there). That contrast is the hook; use it rather than a generic “you might also like


