Rigging does not have to be a nightmare. For 3D animators and game developers, the bridge between a static mesh and a living, breathing creature is the rig. Manual rigging gives you granular control, but it is usually the bottleneck in a fast-paced production pipeline.
Blender Rigify is the built-in auto-rigging add-on that closes that gap. It rigs bipeds, quadrupeds, birds and mythical beasts in a fraction of the time, and it ships free with every copy of Blender. Whether you are building an open-world RPG or a cinematic short, Rigify keeps your workflow fast, modular and creative.
This guide covers the full arc: how the add-on thinks, which bones matter for a game engine, how to weight paint an animal without tearing the mesh, how to Frankenstein a custom creature out of Rigify samples, and what the newest locomotion research says about the poses you are about to key.
The short version
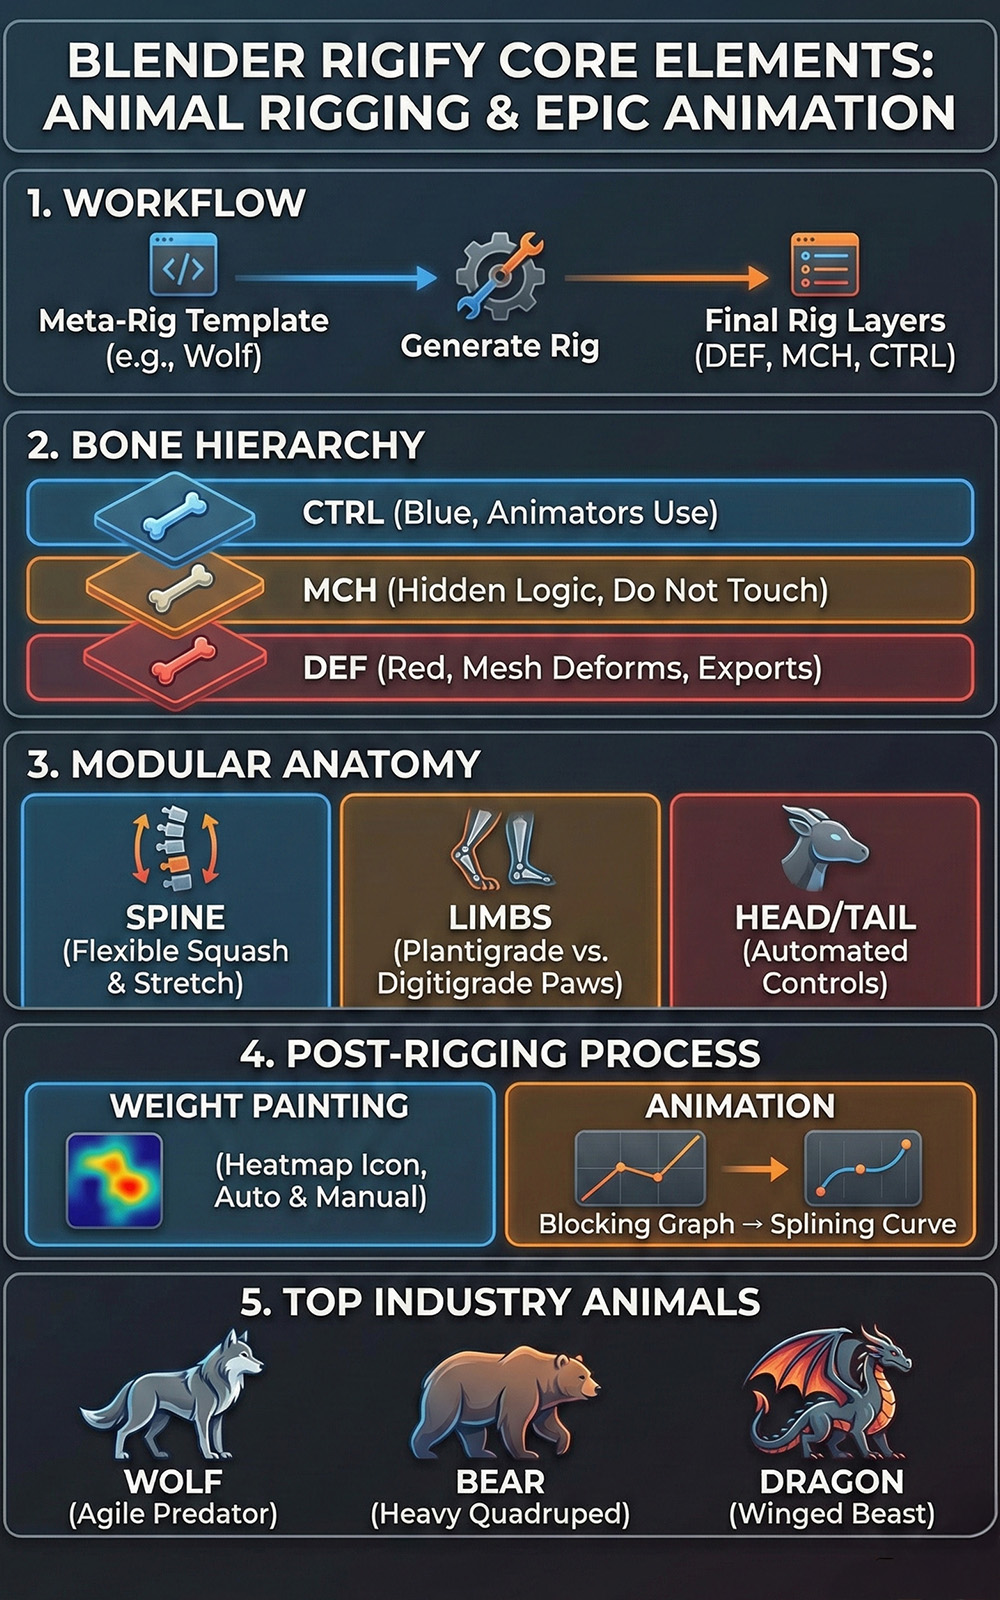
- Rigify is a generator, not a rig. You pose a simple Meta-Rig; Rigify writes the complicated one.
- Only
DEF-bones deform the mesh. Everything else is animator interface and hidden plumbing. - Re-Generate is free. Change proportions late in production and keep your weights.
- Animals need paw and tail rig types, not the human leg – the extra hock joint is the whole point.
- Blender 4.0 broke old rigs on purpose. Bone Layers are gone; press Upgrade Metarig before you panic.
- The rig is only half the job. Weight painting and reference-driven timing are what sell the weight of the animal.
What is Blender Rigify?
Blender Rigify is a pre-installed add-on that automates the creation of complex character rigs. Instead of hand-building every constraint, Inverse Kinematics handle and driver, you align a simplified Meta-Rig template to your model and press one button. Rigify then generates a production-ready armature with custom bone shapes, IK/FK switches, stretch controls and a bone-layer interface.
Enable it once under Edit > Preferences > Add-ons > Rigify. From that point on it lives in Add > Armature, alongside the stock human, cat, wolf, horse, bird and shark templates.

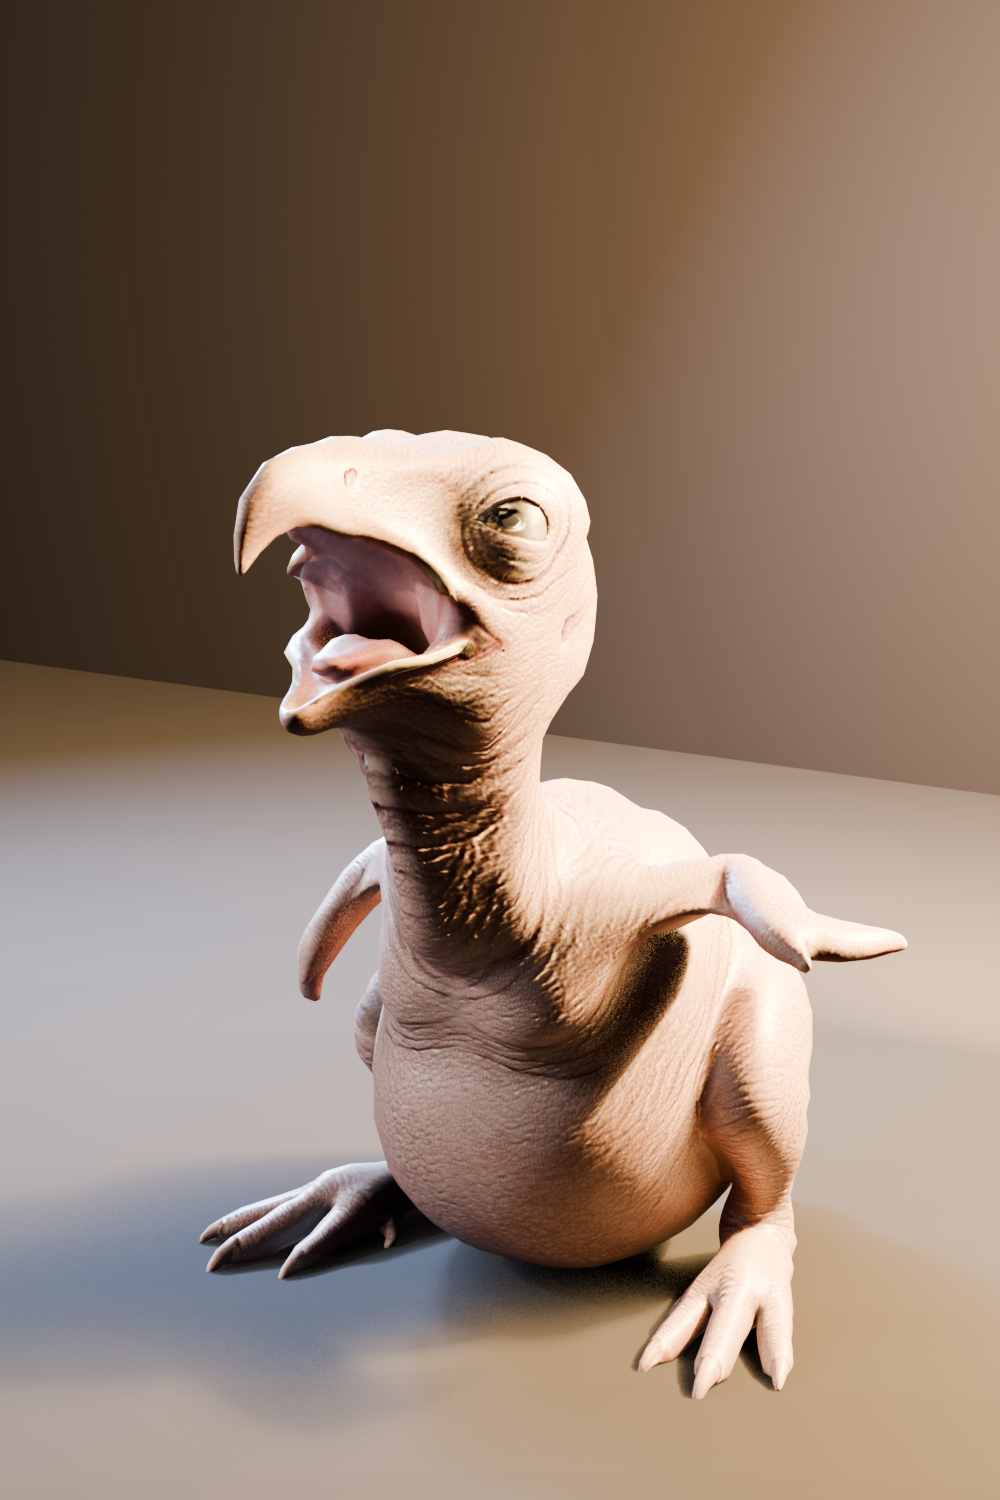
A featherless eagle to master eagle locomotion before adding feathers.
Core concepts: the three-stage Rigify pipeline
To use Rigify effectively you only need to hold three stages in your head. Everything else in the add-on is a variation on them.
DEF- bones. These are the ones you bind your mesh to, and the only ones a game engine ever needs.
Keep the Meta-Rig in the file forever. It is the source of truth, it is tiny, and it is the only thing that lets you re-generate later.
Every bone in Blender’s stock Bird (Meta-Rig), coloured by the collection it belongs to and explained in a line. 38 of the 75 carry a rigify_type; Generate turns the lot into 357 control bones.
Colour is not decoration here: the six groups are the meta-rig’s own bone collections, and their hues sit at exactly 60 degrees apart on the wheel, each tuned to the same perceptual lightness so no zone shouts louder than another. Cool violet and azure carry the airframe, warm orange and magenta the head and plumage, green the two ways the bird touches the ground. Selection is signalled by brightness alone.
Bird (Meta-Rig), Blender 5.1
75 bones · 6 bone collections · 38 rig elements
Bones in Rigify: the under-the-hood logic
Understanding the bone hierarchy is what separates a rig that exports cleanly from a rig that fills your Unity project with 400 useless transforms. Every bone Rigify creates belongs to one of three families.
| Prefix | Family | What it does | Do you touch it? | Export it? |
|---|---|---|---|---|
| CTRL | Control bones | The visible widgets – circles, cubes, arrows – that the animator grabs. They drive the mechanism but never deform the mesh directly. | Constantly. This is the animation interface. | No |
| MCH- | Mechanism bones | Hidden helpers that carry the logic: IK constraints, stretch factors, rotation limits, IK/FK blending. | Almost never. Editing these breaks Re-Generate. | No |
| DEF- | Deformation bones | The skeleton your mesh is actually weighted to. Rigify auto-prefixes them with DEF-. |
Only in weight paint mode. | Yes – only these |
| ORG- | Original bones | A hidden copy of your Meta-Rig, kept so Rigify can rebuild relationships on the next generation. | No. | No |
Exporting the whole armature. A generated wolf rig can carry 300+ bones, and roughly 60 of them are deform bones. Ship all 300 and you pay for every one of them in skeleton evaluation, animation clip size and retargeting confusion. See the export checklist below.
Explore a real Rigify skeleton in 3D
Reading about bone chains is one thing; seeing where they sit is another. The viewer below is the stock Blender Human (Meta-Rig) after generation – 159 bones, grouped into 19 clickable chains. Drag to orbit, then click any chain to isolate it and read what it controls. The same chain logic applies to every animal meta-rig; only the proportions change.
One rig element, faces.super_face, sits on a single bone and turns every chain below into a working face rig. Click a chain to see what it becomes.
Human (Meta-Rig) in Blender 5.1
19 chains · 159 bones · colour = face region
One Rigify element – faces.super_face on the face bone – builds the entire facial rig: eyelids, brows, jaw, lips, tongue. On an animal you usually strip it back to jaw, eyes and ear chains, which is why creature heads generate so much faster than human ones.
Anatomy of a rig: spines, limbs, heads and tails

Rigify is modular. You build a creature by snapping rig types together like LEGO bricks, and each type brings its own controls and constraints.
- Spines. The core of the rig. Rigify offers flexible spines with squash and stretch, which is essential for the body wave of a cheetah, an otter or a jaguar.
- Limbs. The
limbs.super_limb,limbs.legandlimbs.pawtypes cover almost everything on four legs. The paw type adds the extra hock joint that quadrupeds need. - Heads. The head chain includes automated eye tracking and jaw controls, plus optional neck subdivision for long-necked animals like the African elephant or a giraffe.
- Tails. Tail modules ship with bend controls, so you get fluid wavelike motion without rotating every vertebra by hand.
- Wings. There is no official wing type, so bird rigs are usually a
limbs.super_limbarm plus feather chains driven by constraints. Our automatic bird rigging intro walks through that setup.
Plantigrade, digitigrade and unguligrade: pick the right leg
Choosing the wrong leg type is the most common cause of a quadruped that “walks like a person in a suit”. The difference is where the animal’s weight passes through the foot, and it changes the number of joints your IK chain needs.
| Posture | Weight rests on | Animals | Rigify type | Rigging note |
|---|---|---|---|---|
| Plantigrade | The whole sole, heel included | Bears, humans, badgers, raccoons | limbs.leg | Standard three-joint IK. The heel roll control matters most. |
| Digitigrade | The toes; the heel rides high as the hock | Wolves, cats, dogs, birds | limbs.paw | Four-joint chain. The “backwards knee” is the ankle – label it clearly or animators will fight it. |
| Unguligrade | Hoof tips only | Horses, deer, cattle, antelope | limbs.paw with a shortened toe | Very long metacarpals. Set the pole vector high or the leg pops at full extension. |
If you are unsure which bucket a species falls into, check the skeleton before you place a single bone. Our reference libraries for the wolf, the horse and the brown bear each show one animal from each posture family.
Top animal skeleton structures in Blender Rigify
| # | Meta-rig | Best used for | What makes it different |
|---|---|---|---|
| 1 | Wolf (canine) | Dogs, foxes, hyenas, dire wolves | The gold standard quadruped. Digitigrade paws, flexible spine, full tail chain. Start here for anything on four legs. |
| 2 | Cat (feline) | Lions, tigers, jaguars, panthers | Similar to the wolf but with a floating clavicle and a more mobile spine, which is what gives felines their shoulder roll. |
| 3 | Horse (equine) | Horses, deer, zebras, unicorns | Unguligrade legs with hoof support and a long, low-mobility spine. |
| 4 | Bird | Eagles, hawks, chickens, raptors | Wing armature plus a highly subdivided neck. Feathers are handled with separate bones or constraints. |
| 5 | Shark | Fish, eels, sea serpents, whales | A spline-heavy rig built around fluid body deformation rather than limb IK. |
The meta-rig is a suggestion, not a contract. A cat meta-rig with the tail deleted and the spine shortened is a faster route to a bear than the wolf, because the feline shoulder is closer to an ursine one. Choose by skeletal proportion, not by species name.
Why rigging animals with Rigify matters in production
In games and film, time is the most expensive asset on the schedule. Rigify buys it back in three ways.
conventionWhich is what makes animation retargeting possible at all
- Standardisation. Rigify produces consistent bone names across every character. That is what lets a studio retarget a wolf run cycle onto a bear with minor tweaks instead of re-animating from scratch.
- Scalability. If you are populating a game ecosystem you cannot spend three days per deer. Rigify turns that into an afternoon, which is the difference between eight species and two.
- Robustness. Generated rigs ship with IK/FK snapping, a safety net for the moments that break hand-made rigs – a creature planting its feet before a jump, a paw locked to a rock while the body keeps moving.
If you are still weighing tools, our breakdown of Blender vs Maya for creature animation in 2026 compares Rigify directly against Maya’s HumanIK and Advanced Skeleton.
How rigging weight painting works
Weight painting tells Blender how much influence each bone has over each vertex. A weight of 1.0 means the vertex follows that bone exactly; 0.0 means it ignores it. Every vertex should total 1.0 across all its bones, which is why Normalize All exists.
- Automatic weights. Your starting point. Select the mesh, shift-select the rig, then
Ctrl + P > With Automatic Weights. Blender estimates influence from bone proximity using a heat-diffusion solve. - Manual painting. Auto-weights fail wherever geometry overlaps – inside a bear’s mouth, under a folded wing, between a tail and a thigh. You repaint those zones by hand: red is full influence, blue is none.
- Weight transfer. Once one wolf is painted well,
Data Transfercan move those weights onto the next canine with matching topology. This is the single biggest time-saver for a creature roster.
The classic error is “Bone heat weighting: failed to find solution for one or more bones”. It has three usual causes: non-manifold geometry, duplicate or interior faces, or a bone sitting outside the mesh volume. Run Mesh > Clean Up > Merge by Distance, check Recalculate Normals, apply all scale with Ctrl + A, and confirm every deform bone is actually inside the surface.
Nine Rigify errors and how to fix them
Rigify fails loudly, which is a gift. Nearly every error message maps to one of these causes.
| Symptom | Real cause | Fix |
|---|---|---|
Generation fails with a RIGIFY ERROR banner | A rig type cannot find the number of bones it expects in the chain | Read the bone name in the error. A limbs.paw needs exactly four bones; a super_head needs a neck chain plus a head. |
Bones are named .L.001 instead of .L | Duplicated bones rather than symmetrised ones | Delete the right side, select the left, then Armature > Symmetrize. Never duplicate and mirror by hand. |
| The rig generates but the N-panel is empty | The generated UI script was not registered | Open the Text Editor, find rig_ui.py, press Run Script. Re-save the file afterwards. |
| Limbs bend the wrong way at full extension | The chain is perfectly straight in the Meta-Rig, so IK has no bend hint | Give every joint a few degrees of pre-bend in edit mode. A dead-straight leg is undefined for a solver. |
| The knee jitters or flips during a crouch | Pole vector too close to the limb plane | Move the pole target further out, or switch that limb to rotation-based pole control in the rig type settings. |
| Mesh tears at the shoulder on a run cycle | Weights split between clavicle and upper arm with no blend band | Paint a two-to-three ring gradient across the joint and run Normalize All. |
| The mesh explodes on generation | Object scale not applied, or the mesh is still parented to the Meta-Rig | Ctrl + A > All Transforms on mesh and armature, unparent, generate, then parent to the generated rig. |
| Right-side limits behave differently to the left | Limit Rotation constraints were copied, not mirrored, so the min/max signs are wrong | Flip the sign on the mirrored axis. This one silently clamps folded wings and folded legs on one side only. |
| Unity imports hundreds of empty transforms | The whole armature was exported instead of the deform layer | Follow the export checklist. Export only DEF- bones. |
Blocking vs splining after the rig is done
Once the animal is rigged, animation splits into two phases. Confusing them is why so many creature cycles feel weightless.
Why the rig decides the outcome: a good rig makes strong poses easy to hit. If you are fighting the controls during blocking – if a paw slides when you rotate the hip, or the spine cannot arch far enough – the splined result will float. Fix the rig; do not compensate in the curves.
Exporting a Rigify rig to Unity or Unreal
This is where most Rigify projects lose a day. Game engines want a clean, single-root, deform-only skeleton. Rigify gives you a 300-bone animator’s playground. Bridging the two is a checklist, not a mystery.
- Apply all transforms on mesh and armature before anything else. Unapplied scale is the root cause of half of all import bugs.
- Set the unit scale so one Blender unit equals one metre. Unity and Unreal both assume metres.
- Isolate the deform layer. Move every
DEF-bone to its own bone collection, then enable Export Deform Bones Only in the FBX exporter. - Bake the animation to the deform bones. Constraints and drivers do not survive FBX; baked keys do.
- Give the skeleton one root. Engines expect a single top-level bone. Parent the deform hierarchy under one root and keep it at the origin.
- Disable Add Leaf Bones in the FBX exporter, or you get a phantom
_endbone on every chain. - Set Apply Scalings to FBX All and Forward
-Z, UpYfor Unity. - Verify in-engine before you animate 40 clips. Import one idle, check the bone count, then continue.
Once the skeleton lands in Unity, the next problem is state machines rather than bones. We covered that end to end in animal locomotion: idle, walk, run and jump in a Unity Animator Controller, and the simpler humanoid case in idle, walk and run locomotion in Unity.
Three animals worth rigging for your portfolio
If you are building a reel for the game industry, these three archetypes cover the technical range a studio wants to see. Rig one from each family and you have demonstrated mass, agility and mechanical complexity.
The heavy quadruped
- Species
- Brown bear, bison, rhinoceros
- The challenge
- Weight and mass. You are managing belly and shoulder jiggle, plantigrade foot roll, and a centre of gravity that lags behind the feet.
- Industry case
- Wilderness games and fantasy RPG druid forms. Convincing weight transfer is a high-value, hard-to-fake skill.
The agile predator
- Species
- Wolf, tiger, jaguar, cheetah
- The challenge
- Spine flexibility plus digitigrade legs, while preserving shoulder volume through a full gallop.
- Industry case
- The most common enemy type in action games, and the most reused rig in any creature library.
The winged beast
- Species
- Dragon, wyvern, giant eagle
- The challenge
- A quadruped body plus folding wings plus a long tail. Wings must collapse without clipping through the body.
- Industry case
- The boss-monster standard. A clean folding wing rig is an instant portfolio win.
For the reference stage, our top 10 predators to elevate your 3D animation skills and top 10 land animals for mastering creature animation break down what each species teaches you. If wings are the goal, start from the featherless martial eagle rig and the baby martial eagle rig, which show a real wing chain before and after feather geometry.
What changed in Blender and Rigify: 4.0 to 5.1
Rigging in Blender moved more between 2023 and 2026 than in the previous five years. If your Rigify muscle memory was formed on 3.x, four changes will bite you. Here is the timeline that matters for animal rigs.
DEF, Face, Tail, FK Legs and IK Legs as readable groups instead of numbered squares. This is also what makes the deform-only export workflow clean: put every DEF- bone in one collection and you can isolate it in a click.
Action.fcurves is gone
The slotted-actions migration completes in the 5.1 API: F-curves are reached through the Action’s layers and slots rather than a flat fcurves collection. Any batch-export or clip-splitting script you wrote before 4.4 will need updating. Plan for it before you upgrade a production file.
Open the file in 4.2 LTS first, press Upgrade Metarig, regenerate, and confirm the bone collections look right. Only then move to 5.x. Jumping a 3.x rig straight into 5.1 is where people lose layer visibility and blame Rigify for it.
What the latest locomotion science says (2025–2026)
A rig is a hypothesis about how a body moves. The closer that hypothesis sits to measured biomechanics, the less you have to fix in the curves. Here is the research from the last eighteen months that should change how you build and animate creature rigs.
Three-legged dogs invent their own gaits
Self Davies, Savage and Usherwood at the Royal Veterinary College tracked fore- and hindlimb canine amputees across a speed range. At higher speeds the dogs settle into a distinct three-beat, gallop-like gait: forelimb amputees use a rotary-like sequence, hindlimb amputees switch between rotary- and transverse-like sequences.
Why it matters for your rig: gait is a solution to a constraint, not a fixed template. If your creature loses a limb, carries a load or drags a wing, do not scale the four-beat cycle – re-derive the footfall order. It is also the cleanest published reference for injured-creature animation.
Cheetah speed comes from spine timing, not spine range
Kamimura and colleagues modelled a cheetah with asymmetric spinal stiffness and found that the phase relationship between spinal flexion and limb stance is the key determinant of high-speed performance. Cheetah-like solutions reduced ground reaction forces while holding horizontal velocity better than the alternatives.
Why it matters for your rig: animators over-rotate the spine and under-time it. Build the spine so its peak flexion can be offset a few frames from the contact keys, then animate that offset. The magnitude of the arch matters far less than when it happens.
Uphill, resisted and accelerating running sit on one force–velocity curve
Vonderscher and co-authors showed that propulsive force capacity measured during level acceleration matches the force produced running uphill or against resistance, with only trivial differences. Different mechanical constraints, same underlying capacity.
Why it matters for your rig: you do not need a separate uphill run cycle authored from scratch. A single well-built run, retimed with a lower velocity and a longer stance, is biomechanically defensible – which is exactly how a blend tree wants to work.
A muscle-driven dog robot confirms the shoulder “hammock”
Ito and colleagues built a canine limb from thin McKibben artificial muscles and varied the pressure in the shoulder muscles. Higher pressure lengthened the stroke, confirming that the dog’s muscular shoulder sling – there is no clavicle joint – actively extends stride rather than merely suspending the trunk.
Why it matters for your rig: a canine or feline scapula should slide along the ribcage, not pivot on a fixed socket. Rig the shoulder as a floating control with translation, and your run cycle gains reach without extra bones.
Robots learn gait transitions the way animals do
Humphreys and Zhou trained quadruped robots with a control framework built on animal gait mechanisms. The robots generalised across unseen terrain, transitioned between gaits on their own and recovered from instability – behaviour that emerged from the gait priors rather than being scripted.
Why it matters for your rig: the transitions are the animation. Studios increasingly ask for gait-transition clips (walk-to-trot, trot-to-gallop) rather than more locomotion loops, because the loops are the easy part.
Flight feathers hook together into one continuous surface
Matloff and colleagues showed in Science that adjacent flight feathers lock via a directional microstructure, letting a wing behave as a single morphing sheet and resist separation in gusts. Follow-up bionic work – including 2025–2026 folding-wing designs modelled on the Eurasian eagle-owl and the peregrine falcon – treats the fold as a four-bar linkage with elastic recoil.
Why it matters for your rig: do not rig feathers as independent chains. Drive them from a small number of wing-fold parameters so the surface stays continuous, and model the fold as a linkage – hand, forearm and upper arm collapsing in a fixed ratio.
Four of these six papers point at the same thing: timing and coupling beat range of motion. Spine phase, footfall order, gait transitions and feather linkage are all coordination problems. Build rigs that make coordination easy to author – offsettable spine controls, readable footfall order, a single wing-fold slider – and the animation gets better without adding a single bone.
Part 1: the best courses for rigging animals with Rigify
These are the industry-standard free resources. CGDive is widely treated as the reference text for Rigify on YouTube.
| Instructor | Course | Why it is top tier | Link |
|---|---|---|---|
| CGDive (Todor) | Rig Anything with Rigify | The gold standard. Everything from basic dogs to custom multi-limbed aliens. He explains why a system works, not just which button to press. | Watch |
| CG Cookie | Rigging a Dog in Blender | Best for beginners. A clean, specific walkthrough of the wolf meta-rig applied to a dog. | Watch |
| Grant Abbitt | Easy Rigging Using Rigify | Best for low poly. If you are making indie game assets, this workflow is faster and less technical than CGDive’s. | Watch |
| Blender Manual | Rigify rig types reference | Best for lookup. The only complete, current list of every rig type and its parameters. Bookmark it. | Read |
| Blender Studio | Production rigs and character files | Best for reverse-engineering. Open a shipped production rig and see how professionals structured the bone collections. | Browse |

Part 2: ten Rigify concepts that turn you into a technical artist
Mastering these moves you from button masher to technical artist – the person a studio calls when a rig breaks two days before a milestone.
| # | Concept | What it is | Where it pays off |
|---|---|---|---|
| 1 | Rig types | The logic assigned to a bone chain, for example limbs.super_limb versus spines.basic_spine. | Game dev: a tentacle rig type on a monkey’s tail lets it curl around branches, which a standard tail type cannot do cleanly. |
| 2 | Re-generation | Move bones in the Meta-Rig and regenerate; the final rig updates without losing your skinning weights. | Production: the art director shortens the bear’s legs after rigging. Scale the Meta-Rig leg, regenerate, done in five minutes. |
| 3 | DEF bones | The deformation layer. The only bones that actually move the mesh. | Unity / Unreal: export only DEF- bones to keep skeleton evaluation cheap and retargeting sane. |
| 4 | IK/FK snapping | UI buttons that snap a limb between inverse kinematics (locked feet) and forward kinematics (free swing) without a pose jump. | Animation: a creature climbing a ledge needs IK hands; the moment it pulls up and runs, snap to FK. |
| 5 | Prop bones | Custom bones added for weapons, saddles, hats or held items. | RPGs: a holster bone on a horse saddle so the player can sheath a sword without a separate attachment system. |
| 6 | Pole vectors | The knee and elbow targets, drawn by Rigify as arrows or spheres. | Film: essential for preventing knee popping when a creature crouches low to the ground. |
| 7 | Jaw pivot placement | Where the jaw bone sits relative to the ear canal. | Lip sync: placed wrong, the mouth hinges like a puppet instead of sliding like a real mandible – and the shot dies. |
| 8 | Widgets and bone shapes | The custom meshes that stand in for control bones. | UX: a box for the head, a circle for the eyes. Animators should know what they grabbed without reading a name. |
| 9 | Soft IK and stretch | A slider that lets a limb stretch slightly when the IK target moves out of reach. | Stylised games: the backbone of squash-and-stretch, and it hides pops at full extension in realistic work too. |
| 10 | Bone collections and the UI script | Rigify generates a script that organises bones into clickable groups in the N-panel. | Complex rigs: hide the face collection while blocking a run cycle and the viewport stops fighting you. |
Part 3: how to build a custom animal rig
Sometimes no default meta-rig fits – a dragon, a spider, a centaur. Then you build a Frankenstein rig from samples. The core idea is simple: Rigify does not care what the animal looks like, only what each part does.
The workflow, step by step
- Start empty.
Add > Armature > Single Bone, then delete that bone so you have an empty armature object. - Open the building blocks. Enter Edit Mode, go to the Armature Properties tab (the green running figure), scroll to the Rigify Buttons section and find Add Sample.
- Assemble the parts. Add
spines.super_spineand align it to the back. Addlimbs.pawfor an animal leg orlimbs.legfor a humanoid one. Addspines.basic_tailandspines.super_head. Build the left side only. - Connect the parts. Rigify needs to know the leg belongs to the spine. Select the thigh, shift-select the hip bone, then
Ctrl + P > Keep Offset. Now the leg follows the spine. - Assign rig types. If you added a bone by hand rather than from a sample, Rigify does not know what it is. In Pose Mode, select the first bone of the chain, open Bone Properties > Rigify Type and set it, for example
limbs.super_limb. - Symmetrize. Select all left bones, right-click and choose Symmetrize. Rigify names the mirrored side
.Rautomatically. - Generate. Back in Object Mode, press Generate Rig. Fix any error the banner reports, then generate again.
- Bind and test. Parent the mesh with automatic weights, then immediately pose the extremes – full crouch, full extension, head turned hard left. Fix weights before you animate anything.
Instead of writing a custom controller for a centaur, you snap a human spine sample onto a horse body sample. A complex mythical creature is rigged in minutes and ready for Unity – the same modular logic we use throughout the 2D concept to game-ready asset pipeline.
Hard work is still required. Sculpting, rigging and animating well come from consistent study – anatomy, life drawing, documentaries, and slow-motion footage of the real animal. The rig only ever encodes how well you understood the creature.
Frequently asked questions about Blender Rigify
Is Rigify free, and do I need to install anything?
Rigify is free and ships with Blender. It is bundled but disabled by default, so enable it once under Edit > Preferences > Add-ons and search for “Rigify”. No download, no licence, no account.
Can Rigify rig animals, or only humans?
It rigs animals natively. Blender ships cat, wolf, horse, bird and shark meta-rigs alongside the human one, and every rig type can be combined freely to build species that have no template – dragons, spiders, centaurs.
Which bones do I export to Unity or Unreal?
Only the DEF- bones. Move them into their own bone collection, enable Export Deform Bones Only in the FBX exporter, bake your animation to those bones and disable Add Leaf Bones. Everything else – CTRL, MCH, ORG – is authoring-time scaffolding.
Why does “With Automatic Weights” fail on my creature?
The bone-heat solver needs clean, manifold, closed geometry with every deform bone inside the mesh volume. Merge doubles, recalculate normals, remove interior faces, apply all scale, and make sure no bone pokes outside the surface. Fix those four and the solve almost always succeeds.
Can I change my creature’s proportions after rigging?
Yes – that is what Re-Generate is for. Edit the Meta-Rig, press Generate again, and Rigify rebuilds the control rig in place while your vertex groups keep their names and weights. This is the single strongest argument for keeping the Meta-Rig in the file.
Should I use a digitigrade or plantigrade leg for my animal?
Digitigrade (limbs.paw) for anything that walks on its toes: wolves, cats, dogs, birds. Plantigrade (limbs.leg) for flat-footed animals: bears, badgers, humans. Hoofed animals use a paw chain with a shortened toe segment. Getting this wrong is the main reason a quadruped reads as a person in a costume.
Rigify vs Auto-Rig Pro: which should I use?
Rigify is free, open, scriptable and the standard for custom creatures, which makes it the better long-term investment for a technical artist. Auto-Rig Pro is paid and ships a smoother game-export pipeline out of the box. If your bottleneck is FBX export, Auto-Rig Pro saves time; if your bottleneck is unusual anatomy, Rigify wins.
My old rig lost its bone layers after upgrading Blender. What happened?
Blender 4.0 removed Bone Layers and Bone Groups in favour of Bone Collections, and pre-4.0 meta-rigs carry no collection data. Rigify shows an Upgrade Metarig button under the Armature tab – press it, then regenerate the rig. Do this in 4.2 LTS before moving the file to 5.x.
How long does it take to rig an animal in Rigify?
For a quadruped built on an existing meta-rig, expect two to four hours to a bound, testable rig – most of it spent on weight painting, not on bone placement. A fully custom creature with wings or extra limbs runs a day. A comparable hand-built rig is two to three days.
Keep reading
Sources and references
- Blender Foundation. Rigify. Blender Manual, latest release. docs.blender.org
- Blender Foundation. Rigify rig types reference. Blender Manual. docs.blender.org
- Blender Foundation. Blender 4.0 release notes: Animation & Rigging – Bone Collections replace Bone Layers and Bone Groups. developer.blender.org
- Blender Foundation. (18 March 2025). Blender 4.4 release notes: Slotted Actions. developer.blender.org
- Blender Foundation. (18 November 2025). Blender 5.0 release. blender.org · Animation & Rigging notes
- CGDive. Blender 4 updates: rigging and animation – Rigify bone collections, spline tentacle rig, mouth rig and the Upgrade Metarig button. cgdive.com
- Self Davies, Z. T., Savage, A. L., & Usherwood, J. R. (2026). Locomotion on three legs: the tripedal gaits of canine amputees. Proceedings of the Royal Society B, 293(2069), 20253159. doi.org/10.1098/rspb.2025.3159
- Kamimura, T., Oshita, Y., Adachi, M., Ambe, Y., Sano, A., Wada, N., Matsuno, F., & Aoi, S. (2026). Phase relationship between spinal motion and limb support determines high-speed running performance in a cheetah model with asymmetric spinal stiffness. arXiv:2604.00329. arxiv.org
- Vonderscher, M., Morel, B., Rozier-Delgado, P., Morin, J.-B., Bowen, M., & Samozino, P. (2026). Moving against inertia, friction and gravity: different modalities, same consequences for animal propulsive force capacity. Journal of Experimental Biology, 229(7), jeb251127. doi.org/10.1242/jeb.251127
- Ito, S., et al. (2026). A canine musculoskeletal robot for investigating biomechanical functions during locomotion. Advanced Robotics Research. doi.org/10.1002/adrr.202500170
- Humphreys, J., & Zhou, C. (2025). Learning to adapt through bio-inspired gait strategies for versatile quadruped locomotion. Nature Machine Intelligence. nature.com
- Matloff, L. Y., et al. (2020). How flight feathers stick together to form a continuous morphing wing. Science, 367(6475), 293–297. science.org
- CGDive. Rig Anything with Rigify. YouTube. youtube.com/c/CGDive
- CG Cookie. (2024). How rigging works in Blender. cgcookie.com
- Unity Technologies. Using Blender and Rigify. Unity Manual. docs.unity3d.com